
This is the second and final post about QA testing in virtual reality. If you didn’t read the first post, Navigating the maze of testing virtual reality – Part 1, then you should read that first.
Test Execution
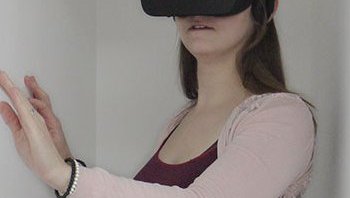
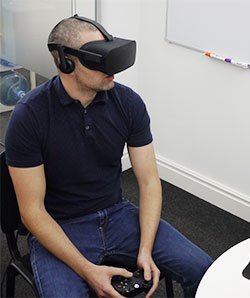
It is hard to describe what it is like wearing the headset for the first time. It’s a mixture of disorientation, fascination and being a little inundated with trying to remember what the test script was that you were following, using an Xbox controller for movement and still testing the actual functionality at the same time. It did take a good day of testing to get into the routine of following the below process:
- Read test script
- Put headset on
- Trigger level as facilitator
- Navigate through the maze
- Remove headset
- Mark test steps as pass/fail
Highlights and lessons learnt during the testing phase
High level test scripts
Initially these were written quite detailed, but we soon realised that they needed to be written more high level. This saved time when writing the test scripts compared to having to write detailed step by step test scripts. The key was to keep things general within the test scripts. Although the tester needs to be aware to raise issues that are cosmetically incorrect, they do not have to include the specific details to check. The test scripts being general will also reduce the amount of maintenance required for them.
2D Map
The addition of a 2D map view of exactly what was being shown to the Oculus user was an advantage during the testing phase. This actually comes with the Oculus and we did not have to build this ourselves. This was the only view that allowed us to take screenshots as we couldn’t do this within the Oculus itself. We couldn’t take screen shots of everything but this could be used for at least half of the found issues. It also allowed some of the tests to be run without the headset as it wasn’t essential to be 3D tested which gave us a break from the headset.
Facilitator map view
This was a requirement, which we found really helpful during testing and would recommend this to be built for future projects. This allowed us to have an overview of each level as a whole including the following:
- Maze starting point
- Maze end point
- Location of objects within the maze
- Location of the subject as they move around the maze in real time
Two testers are better than one
During the testing cycle we were able to parallel test on the project. Obviously this does mean higher costs than a traditional project, however, a lot of time is saved by the first tester not having to run through the test scripts beforehand or having to repeatedly take the headset off and therefore losing their current position in the maze. We found that the second tester worked well to support the first tester and had advantages which should be seriously considered during estimation and scoping on any virtual reality project:
- Read through and mark pass/fail on the test scripts while the first is wearing the headset
- Guide the first tester through the maze using the facilitator map view
- Second pair of eyes on the maze using the 2D map view
- Take screenshots of defects using the 2D map view
- Write detailed defects as the first tester described them during the execution. This ensures defects are more accurate as you remember all of the information.
Glasses v Contact Lens
The Oculus can accommodate people wearing glasses, although taking the headset on and off can be really annoying. We found this helpful as using the Oculus really dries your eyes out which is a lot more noticeable and uncomfortable when wearing contact lens.
Rift Face
We found that after extensive use ‘Rift Face’ markings would appear on your face outlining exactly where the Oculus had been sat.
Unexpected issues we came across during the testing phase
Time
Test runs took lot longer than estimated. Being unable to skip to a specific part of a maze meant tests relating to the end of a maze for example would require us to work through the beginning part of the maze as a prerequisite. Testing each level wasn’t just the functional testing of the maze, it included several other items:
- Recording of the results (As in timings, turns taken)
- Audio (Instructions, background)
- Controls
- Visual effects
Scheduled break times needed to be planned in as the recommendation for using an Oculus is 10-15 mins of break time after every 30 minutes which means for each hour of testing you perform you would need to allow 1 hour 20 minutes!

Adverse effects
We found that virtual reality affects each person differently. One of us had a few minutes of nausea which improved with each use, and disappeared after using the Oculus for a couple of hours. The other one of us had much worse nausea, experiencing around an hour of feeling ill after their first half hour of testing on the Oculus. This only eased slightly over the course of the entire testing cycle. Other side effects experienced were dizziness and fatigue. These were all despite the fact that guidance around motion sickness had been taken into account during development.
Monotony
After the initial excitement of testing virtual reality wears off, the repetitiveness soon becomes challenging. Having to re-run one specific level ten times in a row can get extremely dull. We found we had to be vigilant so as to not subconsciously rush through the level as this could easily result in missing defects.
Recreating Defects
Although we had the use of a 2D map, is was extremely difficult to recreate defects for the developer. When working alone, the tester would have to lift their headset to take the screenshot which often meant the view had changed and screenshots were not as accurate as we would have liked. To overcome this we had to put as much details into our defect tickets as possible.
User Acceptance Testing
As mentioned previously our client was heavily involved in the whole process. They have their own Oculus Rift which meant that specific QA/UAT times did not have to be scheduled which reduced time pressures. It also meant that whilst the clients were testing one phase we were able to progress to the next phase of development without affecting the UAT environment. Each time we released to the client they worked on an ad hoc basis testing each individual ticket rather doing it all at once. This allowed the client to test based on priorities.
The agile methodology worked really well as we were constantly getting feedback regarding user experience. This meant we could address these areas quite early on rather than having to rip out chunks at a later stage.
How do we regression test … ?
This so far is not yet tried and tested for us. In an ideal world there would be an automated test suite created to handle this. As the project is still in flight we are not in a position to automate this yet and will review it at a later date.
Conclusion
In conclusion working with the Oculus Rift has been a fun yet challenging project. We have really only dipped a toe in the water in relation to virtual reality testing. It has been overall a positive experience which we have learnt a great deal from.
Until we gain more experience and develop our approach it will be more time consuming and cost more than testing on non virtual reality software. We have adapted our usual practices for the whole of the test phase and even though we are pleased with our new process for this type of project we are not out of the maze yet and it is still very much a work in progress…
